This wonderful recipe doesn’t require any long kneading or proofing, just mix until it comes together (almost like making scone dough), roll or press out, and bake. That means you …
Quick and easy braaibroodjie flatbread (yeast free)
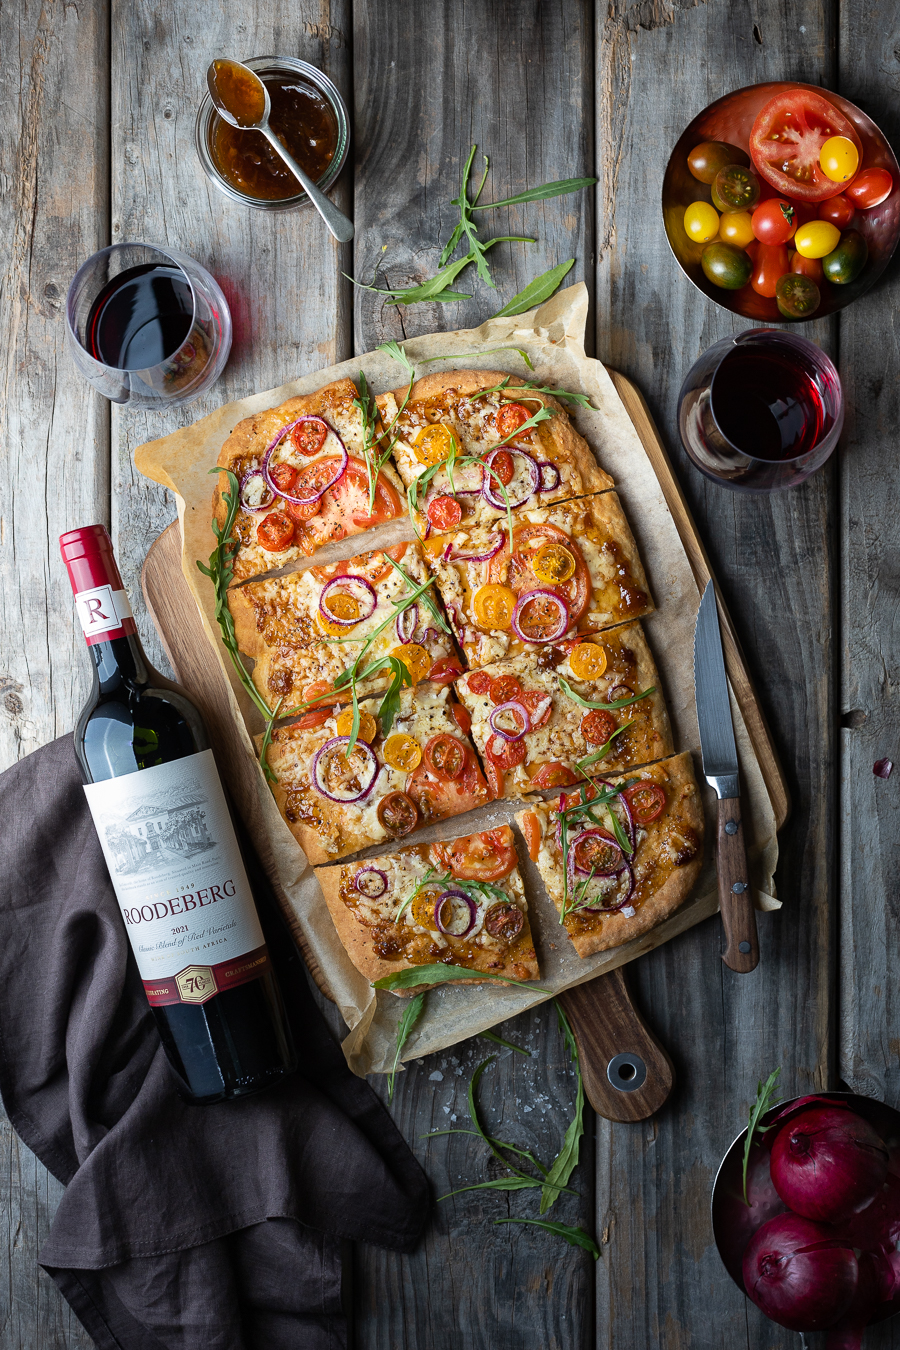

This wonderful recipe doesn’t require any long kneading or proofing, just mix until it comes together (almost like making scone dough), roll or press out, and bake. That means you …
Labneh is a luxuriously soft, creamy, yoghurt cheese that originated in the Middle East. If you haven’t tasted it yet, it is absolutely delicious (similar to a soft, tangy, plain …
This week, I teamed up with Klein Joostenberg Deli on the R304, Muldersvlei, outside Stellenbosch. I’ve always been a huge fan of their shop, because they are a passionate 5th …
I’ve been craving a smoked fish pie for weeks (because of a packet of smoked snoek in my freezer) and I finally got to baking one. This must be …
I’ve been seeing so many recipes for one-pot pasta dishes, where the pasta gets cooked in the pot’s liquid along with other ingredients. I’ve always wondered if it’s really possible …
I’ve been having this craving for golden potato chips covered in cheese sauce ever since we returned from our annual holiday early in January this year. I restrained these …
When it comes to laid-back, festive, scrumptious food that’s packed with flavour, the Italians just know how. I’ve taken a few tips from their most popular traditional cheese-themed recipes to …
Everybody loves a selection of festive cheeses when it comes to entertaining. It can be a generous starter, a light snack or even a classy dessert. In this case, it …
You might have noticed some brand changes going on with Simonsberg cheese: they’re becoming Président. You’d be happy to know that it’s still the same fantastic products with the same …
The Italians have a wonderful way of using up leftover risotto. They shape the cold rice mixture into balls, stuff the centres with cheese, cover the balls with breadcrumbs and …