Scott Armstrong joined the team at The Demo Kitchen in May 2015 as an intern – part of his practical experience (food media) for his chef’s course at the Institute of Culinary Arts. He was a quiet guy from the get-go, but I immediately realized what he’s made of after I plunged him into the deep side with a four-day cooking demo marathon at the Good Food & Wine Show.
Scott was always 30 minutes early for work. He skated here with headphones in his ears. He had loads of initiative and brought new recipes to the kitchen often. He had a very small notebook where he wrote down recipes like a journal, the pages falling apart from steamy kitchen environments.
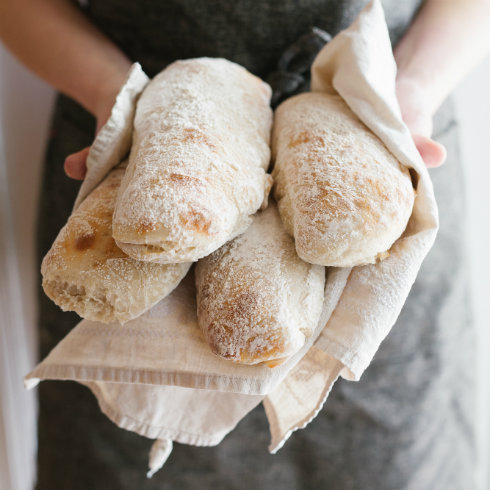
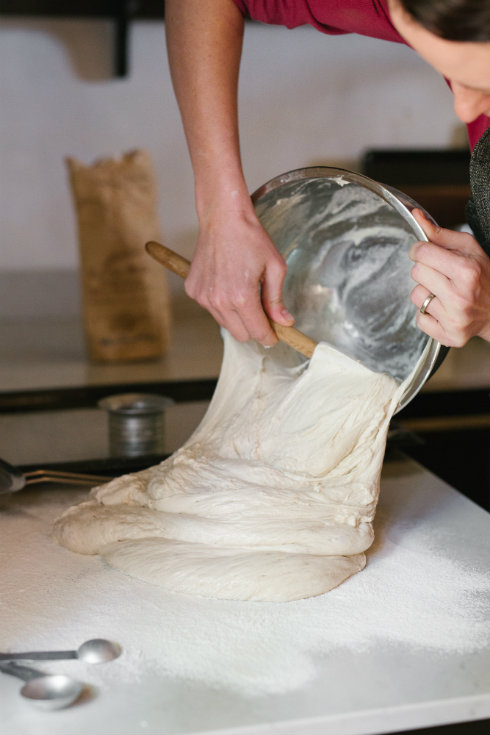
The best recipe that Scott had introduced to me last year, is this bread recipe. He made paninis for our sandwiches everyday, and they were absolutely drop-dead delicious. I love a good bread recipe, and this one may be the best I’ve come across that doesn’t use a mother starter dough or several hours of double proofing or a wood fired oven. You do, however, need a stand mixer because the dough is super runny. You’ll also need a dough scraper for cutting and handling the proofed dough, otherwise the portions are very difficult to transfer to the baking tray. Expect to clean your mixer afterwards, because the sticky dough creeps up into the motor mechanism. But I promise you, it’s all worth it.

Thank you Scott for sharing this recipe with me. I’ll treasure it while I watch you excel at your promising career as a darn good chef.
Ingredients:
- 1 kg (6,5 cups) white bread flour (plus more for dusting)
- 15 ml (1 tablespoon / 10 g) instant dry yeast
- 15 ml (1 tablespoon / 20g) salt
- 1 liter (4 cups) lukewarm water
Method:
- Place the flour, yeast and salt in the bowl of a stand mixer fitted with the paddle attachment (K-beater, not dough hook). Mix on low-speed.
- With the mixer running, add the water all at once. Mix for a couple of seconds on low-speed, then turn up the speed to maximum and mix for 8 minutes continuously.
- Scrape down the runny dough from the beater using a spatula, then cover the bowl with plastic wrap and leave to proof in a warm place until doubled in size (it reaches the top of the my mixer’s bowl) – about 45 minutes.
- In the meantime, pre-heat your oven to 230 C. Line a large baking tray with non-stick baking paper (or use a sieve and dust with flour). Also, dust a large clean working surface with flour.
- Remove the plastic wrap and use a spatula to turn out the bubbly dough onto the floured surface – do not punch down the dough. Sieve more flour over the top of the dough, then use a dough scraper to cut squares or rectangles out of the dough. Transfer each one as soon as it is cut, using the dough scraper, to the baking tray. The dough will feel light as air at this point, almost like marshmallows, but is very runny and should be handled with lots of dusted flour and a light touch. Leave a little space between the dough portions, as it will rise more in the oven.
- Bake at 230 C for about 15 minutes until golden brown, depending on the size of your paninis/loaves. Remove from oven and place on a cooling rack.
- Serve as sandwiches filled with your choice of filling, or slice up and use as a dipping bread for antipasti platters.
Tip: Keep left-over bread wrapped in plastic bags, and give it a quick refresh in the oven before serving to return it to its full glory.
Credits:
Recipe adaptation, food preparation, food styling & text: Ilse van der Merwe
Photography, prop styling: Tasha Seccombe
This post has also been featured on The Pretty Blog.


it is even worth trying this recipe if I don’t have a stand mixer? Mixing bread doughs by hand are a pain, but my budget battles with my foodie-self. Please advice.
Hi Kris, I hate to say it, but no, it won’t be doable without a stand mixer. This is a super runny dough that needs to get beaten on high speed until the gluten starts to change and the mixture gets all silky. Unfortunately our human hands are just not made to do this! Maybe you could convince a friend (who owns a mixer) to lend you hers/his? I hope you get to try it – it’s such a satisfying recipe!
The dough was incredibly soft and light When there was alot of dusting going on, otherwise it stuck to everything.I got 8. I pulled them out of the oven about 10 minutes ago. They Puffed up alot more then I was expecting. The outside Crisp and chewy! The inside is light and fluffy but doesn’t have the huge bubbles like I would of liked
Did you mean to indicate the amounts of Flour, yeast, and salt on grams? It makes a large difference.difference.
Thank you for the suggestion William, I’ve adapted the post and the quantities are now also in grams.